A few of you have asked if I also made things like furniture. Well, of course!
Since crafting is a bit difficult with the while house filled with moving boxes, I thought it would be nice to show you the bed that Joost and I made a year ago.
When I moved in with Joost last year, we discovered that we had a big shortage on storage space. So we decided to build a bed with not only a lot of storage space underneath, but also space for our dryer!
Before I talk you through the process, there is one thing I need to clear up!
As I looked through the old photo's, I noticed one thing: I was completely absent in all pictures! What the wup?
I engineered the whole thing. I measured. I sawed wood. I drilled holes. I fastened screws. I really, REALLy busted my ass off in this project. But who's in the pictures? Only Joost, that evil boyfriend of mine ;)
 |
| so if you see a picture like this... remember that it happened like this! ;) |
I started by sketching the build plan for the bed, which looked like this:
 |
| The original sketch got lost, so this one doesn't have the exact measurements, but just remember to make it big enough to fit your mattress on top! |
We gathered all spare wood we had laying around the house ( an old bedframe, some wooden shelves from a bookcase, and began!
 |
| we began by making the top square, which was easy because it was simply the old frame of my bed. |
 |
| Adding the legs! the bed is now upside down. |
We attached the legs by making use of old brackets from my bookshelves. saves a lot of money compared to buying similar thing in a hardware store!
We also added slates along the legs for the bottom, otherwise the legs will go all over the place.

Then we turned the whole thing around again!
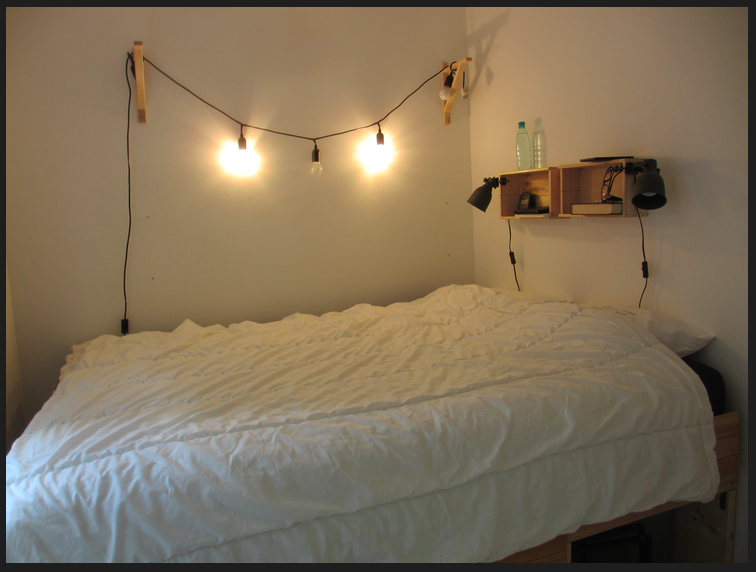
Ps: can you see our cool bedroom light? joost made the garland of lights, and I attached them to some old wooden brackets.

Joost looked really happy while attaching the slatted frame.
now there is some gap in our pictures, because I was busy with the bed as well ;)
But we attached some diagonal slats, to make the whole frame sturdier, en then we simply tossed the matresses on.
We screwed some flooring wood to the side to keep the mattres from moving around, and attached to frame to the wall with a few screws.
the bed was ready for a first night of sleep!
 |
| ready for a sleeping-test! |
The next day, we added some night stands made from wine-cases. The lights attached to the cases are from Ikea (Hectar)
Then we began cladding the bed with old pieces of flooring wood.
We added some steps to the side, and made small doors for the rest of the frame, so you can crawl into to storage space, and reach the dryer!
 |
| Hi there, Broen! |
And we were done!
 |
| His royal furriness approves! |
Now THAT is impressive!! Are you taking the bed with you? I'm sure you'd have to at least partially dismantle it to get it out the door.
ReplyDeleteHi! Thanks!! I'm afraid we will take it apart as we leave :(
DeleteBut we have great ideas for building a new bed in our new house! So, hopefully I can post about that one in a few weeks ( months? I'm not sure ;) )
Love the bed idea. Who doesn't need extra storage? I know I do. What is the purpose of the dryer?
ReplyDeleteThanks!
DeleteThe dryer was needed because the bad weather over here usually doesn't allow us to dry our laundry outside.. Since the extra rooms in the house are very small, the only other option having clothes lines in our living room.. and well, I'm not too comfortable with having my guests staring at my underwear all the time ;)