When I woke up this morning, I decided that it was spring. Even the traces of night frost on the bedroom window didn't change that. It was spring. And spring makes two things inevitable: a desire for house-cleaning and an urge to buy loads of plants.
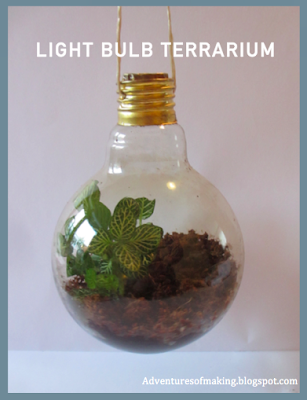
So as soon as I was dressed, I went to the recycle centre to throw away the old, and to the garden centre to buy the new. While I was at the recycle station, I found a beautiful, really big light bulb. I figured "I should make something with that", and so me, my massive amount of plants, and the light bulb made our journey home, where I began to figure what to do with it. Many of you may have seen the cool light bulb vases that inhibit pinterest. But as I am more a plant-girl than a flower-girl, I thought: why not make a terrarium instead? Here's what I did!
Supplies:
- a big light bulb
- a small screwdriver
- some pincers or pliers
- tweezers
- some rope
for your own safety:
- gloves
- not on the picture: safety glasses and a towel to handle the bulb with.
for filling the terrarium
- dirt
- a small plant.
- a small piece of paper.
steps.
First, I began disassembling the bulb.
I used my pincers to grab the little solder point and gave it a good twist to pull it out.
Second, I needed to take out the black glass ring. I held the bulb in my hand with a towel, poked my screwdriver in the small hole and wiggled it around to carefully break the glass. (that's why you need safety glasses!!) with my pliers I removed all the glass pieces.
The part in the middle was removed by poking my screwdriver in it, and again carefully wiggling it until it broke of.I used my tweezers to fetch all the parts out of the bulb.
I smoothened the inside etches by twisting my screwdriver around, breaking of all the remaining glass parts.
The metal edges were still quite rough. Therefore, I folded them over with my pliers.
Then I poked two holes in the side with my screwdriver.
Voila! the terrarium is ready to be filled.
I used the following items:
- some coconut-based dirt (the ones that you have to add water to)
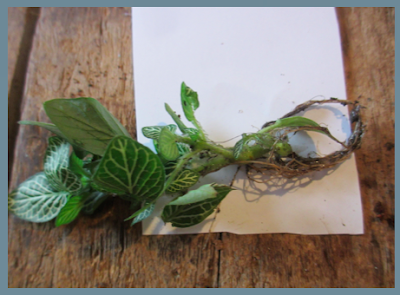
- a small piece of an amazing plant that I had bought at the garden centre; 'Fittonia mont blanc'. I find its leaves so pretty!
I thought a bit about how I wanted to put the dirt into the terrarium. Even though the bulb is quite big, the hole is still quite small. I figured that If I would put normal dirt inside it. It would become very messy, with dirt sticking to the glass everywhere, and no room to clean it up. So I decided to use a bit of compressed dirt. By placing it in the bulb while it is still dry and only adding water when everything is in place, you prevent a big mess, and the swelling of the dirt also secures the plants in an easy way.
I scraped of some dirt ( you can see that I use my poor screwdriver for everything!) en shook it into the light bulb.
when I looked at the plant that I wanted to place side, I realized something. It was way too big to fit into the hole of the bulb without damaging the plant. Then I thought of something: I could roll it into a small piece of paper to reduce its size en and prevent it from being damaged.
I soaked the roots in water for a few minutes (it protects the roots from breaking and drying out While you are busy fiddling with the plant, the paper and the dirt), and rolled the plant into the cutest en healthiest cigarette you have ever seen. I then pushed the roll of paper into the bulb, which fitted nicely.
With my paper, I then retrieved the piece of paper, Which was NOT willing to leave the bulb :( But eventually, I got a good hold on it and got in out.
By some shaking and nudging the plant with my tweezers, I made sure that the plant was upright(ish) and that the roots were covered in the dirt. Don't worry too much if it won't stay upright on its own right now. By adding the water, the plant will get a firmer grip in the mud.
I added some water by simply holding it under the water tab (don't put too much water in though!)
A last step was tying a piece of rope through the holes so that I could hang the terrarium somewhere.
And here it is finished! Looks quite nice, doesn't it?
The rest of the plant also got a nice new home.
Since the bulb was a free treasure and I had already bought the plant and dirt for other purposes ( and used very little of it), this DIY cost me close to nothing. My favorite kind of DIY :) Now, all I have to do, is deciding if I want to keep it for myself, or use it as a nice gift. I'm not sure yet!


This looks awesome. I also love the free diy part of it.
ReplyDeleteThanks! I strongly recommend trying it yourself. And I agree with you: free diy's are the best diy's!
DeleteCheers! Marije
Did you keep the terrarium for yourself or give it away in the end? How is the little plant doing?
ReplyDeleteGreat blog post! =)